CemGEMS tutorial
Getting started
Before trying CemGEMS, you may wish to check this open-access publication:
- Kulik, D.A.; Winnefeld, F.; Kulik, A.; Miron, G.D.; Lothenbach, B. CemGEMS – an easy-to-use web application for thermodynamic modelling of cementitious materials. RILEM Tech Lett 2021, 6, 36-52; doi.
This is the official citation for your reports and publications containing results obtained using CemGEMS.
Accessing CemGEMS web app
The CemGEMS web app is accessible anytime in any modern web browser (except the deprecated Internet Explorer) by navigating to
There are three access options:
-
Try in a demo session (fully operational, but limited to a 3-hour session from one device/browser; anyone can lanch in this mode with two mouse clicks)
-
Register as a new user (user registration providing for persistent user data available any time from any device; requires an active email address for receiving the validation code)
-
Forgot your password? (only for a registered user who lost the password and wants to restore it; requires the same email address that has been used for initial registration)
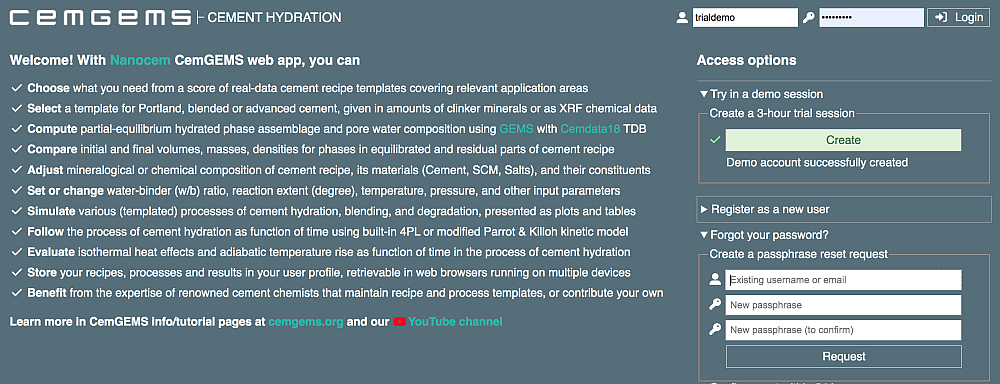
Trial in a demo mode session (without registration)
This option for anyone creates a 3-hour trial session in two mouse clicks without registration. We hope that this provides enough time to work with fully-functional CemGEMS web app in order to decide whether this web app is useful and to register (i.e. log out and use the "Register as a new user" option) for a free permanent account that will keep all the results accessible on any device at any time. Without registration, the trial results will persist in a single browser session for 3 hours or until logout, and then will be automatically deleted. To proceed within a trial session, skip the following paragraphs and go to "The simplest initial workflow".
User registration
When you access CemGEMS for the first time, please register for beta-testing, evaluaton and use of the web service provided free-of-charge by Nanocem consortium. Just fill out a form on the right side, especially correct and valid email address, and click "Request". Then open your email client and look for an arriving email from @cemgems.org with the confirmation code. Back in CemGEMS web app browser page, enter this confirmation code into the respective field, and click "Register". After a confirmation that your account has been created, enter your username (or email address) and password into fields in the upper-right corner, and click "Login".
Forgot the password
This option to reset the password could be helpful for a registered user who lost (forgot) the password and cannot log in. In the appearing form, enter your user name or email address (the same that has been used for the initial registration). When you receive an email with the confirmation code, copy-paste or enter it into the "Confirm reset..." field within 24 hours, then log in with the new password.
Attention!
In case if a registered user needs to change the email address (e.g. due to relocation or job change), he/she needs to email the admin for doing that, providing the new address along with the old user name or email address.
Attention!
In the process of user registration or password reset, it may happen that the email with the confirmation code gets trapped into spam filter or quarantine. If you do not receive such email within 10-15 min, please do not try to register or reset password again. Instead, check your "Spam" folder or wait until next morning to check your email quarantine. The confirmation code is valid 24 hours, which is enough in almost any case. If you still did not receive the code, please email the Admin of cemgems to fix this issue.
Starting a work session
If you have not logged out before closing the browser the last time then CemGEMS web app (in the same browser on the same device) will just work further without login, unless the browser storage was cleaned up (as described in the troubleshooting page) or the web browser was re-installed. If you have the user account in CemGEMS and you worked the last time elsewhere on another device (or in another browser), then it makes sense, after logging in, to click the "Download" button (located to the left of your name) in order to get all your previous work (recipes, processes and plots) from the back-end database into the client database on the new device.
The simplest initial workflow
Once you have logged in for the first time, you will most probably see a page below:

One row is for defining the recipe of cement; another row is for a process simulation that starts from the current recipe. Defauls, visible in the initial page (you can hover the mouse cursor over any selector field to learn what it does), are preset to define:
The first row: a new recipe for OPC (ordinary Portland cement) "CEM-I-OPC" expressed via quantities of clinker mineral constituents "min", to store it under the (editable) name "MyRecipe" after the equilibration.
The second row: a new process (simulation) of type "Hydration-PK" (hydration kinetics vs time using modified Parrot-Killoh model) with stepping (Process Lead) as logarithm of time (in hours), to store the definition under the (editable) name "MyProcess" after the process simulation.
The simplest initial workflow consists of a single mouse click on a "Simulate Process" button. This will activate:
- calculation of partially equilibrated recipe;
- simulation of 101 steps of OPC hydration process using the recipe as a parent;
- sampling and plotting the results as volumes of clinker constituens and equilibrated phases for the time span from 0 to 10'000 hours.
In 10-15 seconds, when calculations are finished, the recipe tables and bar charts, as well as the process simulation plot, will appear automatically. Tables and the plot can be expanded or collapsed by clicking on the triangle symbols located on the left-hand side.
The plot area has its own controls, as shown below:

These controls in the "Plot select..." row are drop-down lists that let the user change the abscissa, the ordinate(s), and the frame chart type (expanded above), each by two mouse clicks. Any such change will automatically replot the frame, making it easy and fast to play with the options and to obtain the desired plot, as shown in screen images gallery.
In this version of CemGEMS, the user can save the plot frame into PNG or PDF file using "Export2png" or "Export2pdf" buttons. It is also possible to save the plot or another area of web page into PNG format using any screen capture function (In MacOS, for example, activated by Cmd_Shift_4).
Expanding the Data Table (by clicking at its triangle) shows the data plotted in the above frame, as defined by the "Abscissa" and "Ordinate" selection. By default, the table contains all process steps as rows. Using a "gate" selection after clicking and dragging in the bottom frame causes the table to display only a selected range of process steps.
Upon clicking on the "Export2csv" button, the data shown in the table will be exported into a .csv (comma-separated-values) format file located in "Downloads" folder local to your device. This file can be imported into Excel, LibreOffice, Numbers or any other spreadsheet or plotting program.
Main workflow sequence
The main workflow of CemGEMS consists of three stages: "Recipe", "Process" and "Plot". The image below shows the fully collapsed entries in CemGEMS web app window, where all three stages are visible as three rows of selectors, buttons and other control elements (some controls do not appear before they are actually needed). The workflow usually proceeds from left to right and from top to bottom.

Working with a cement recipe and single GEM equilibration
A new recipe [definition document] can be created in two ways.
-
From a provided template by first choosing: "New Recipe" in the Recipe selector; cement type in "Cement Type" selector; data type ("min" for quantities of clinker mineral constituents or "xrf" for clinker composition as chemical XRF analysis data); and optionally entering a name into the "Recipe Name" field. Activation of the "Equilibrate Recipe" button will fetch a suitable provided recipe template, compute partial equilibrium state, and store the recipe document (inputs and results) in your user profile database. The Expert-level tutorial page contains more details about the provided recipe templates that cover several types of cement. Any inputs can be modified, and the recipe can be re-calculated and updated under the same key at any time.
-
By cloning a new recipe from an existing [currently selected] one. This is done by clicking the "Clone" button (looks like two squares with a green eye) in the Recipe row. Enter a new recipe name into the appearing field and click "Clone" button, to see the cloned recipe document key selected in the Recipe row. The idea of cloning consists in making a copy of the object under a new name and modifying it in some way (the original object remains unchanged and also accessible). So, before clicking "Equilibrating Recipe", expand the "InputRecipes" table and make the desired changes.
The recipe task document can be modified in many ways, as described in other parts of this tutorial. The easiest to change are W/B ratio, Temperature, or Pressure. In general, the recipe can be explored/edited in the tree-like table at several levels (recipes, materials, constituents, formulae; use triangle control elements on the left-hand side to expand/collapse levels) in either "student" or "expert" view. Advanced operations such as deleting or adding formulae, constituents or materials, require the use of a jsoneditor widget, as desribed in the Expert level and Redefining recipes tutorial pages. After editing, the recipe is computed/stored by activating the "Equilibrate Recipe" button.
The equilibration results are shown as volumes of phases and of residual constituents in the "equilibrateChart" bar charts located below the "inputRecipes" table, and in the "outputResults" tree-like table located below the bar chart.
Any number of new recipes can be created from provided template recipes, briefly described in the recipe templates tutorial page. Any existing recipe can be cloned (with all changes previously done by the user) into another recipe under a different name; any stored recipe can be selected as current; and any current recipe can be deleted (in which case all its child processes and plots will be deleted too).
More details about CemGEMS single-recipe operation, recipe editing and re-configuration options can be found in tutorial pages:
Working with a process definition and simulation
A new process [definition document] can be created only using a current recipe [definition document] as a "seed" or "parent" equilibrated state, which will be automatically cloned, modified, equilibrated and stored as a process step recipe many times (usually about 100 times, as set in most process templates). A new process definition can be created in two ways.
-
From a provided process template by first choosing "New process" in the Process row selector; a process type in the "Process Type" selector; a process lead (stepping) variable scale in the "Process Lead" selector; and optionally entering a name into the "Process Name" field. Activation of the "Simulate Process" button will fetch a suitable provided recipe template and store it under a given process key; compute a partial equilibrium state in the parent (currently active) recipe and save it with results, and run all the process steps with storing the generated step recipe documents in your user profile database, with the modified process document stored at the end of (successful) process simulation. As the process is new, the plot document with a "$default" name will be automatically created from plotting templates, the simulation results will be sampled from all process-generated step recipes, and the plot frame will appear with default settings (usually showing stacked volumes as ordinates and the time or the process step index as abscissa).
-
By cloning a new process from an existing (currently selected) one. This is done by clicking on the "Clone" button (looks like two squares with a green eye) in the Process row; the cloned process definition will be anchored at the same parent recipe as the original one. Enter a new process name into the appearing field and click "Clone" button, to see the cloned process document key selected in the Recipe row. Before clicking on "Simulate Process", expand the Process Settings Table, then Spans and/or Params subtables, and enter or change relevant settings or parameters. Briefly, the Spans subtable defines how the quantities of materials, constituents, temperature, or w/b ratio will be changed stepwise; the Params table defines how the extents (degrees) of reaction will be changed by providing parameters of built-in cement hydration models. One or both subtables can be present in one process definition document. Details on how the latter is arranged and how it can be further modified can be found in Expert level and Redefining processes tutorial pages. When done, click on the "Simulate Process" button to run the simulation and plot the results.
Any recipe with equilibrated results can be used as a "parent" for simulating a process of cement hydration, blending, heating, leaching or salt ingress ("attack", i.e. degradation upon progressive reaction with aqueous solution or with added salts). Various kinds of processes are initially defined in the respective provided process templates, as described in the Process templates tutorial page.
Any existing process document can be cloned (with all changes previously done by the user) into another process under a different name, but with the same parent recipe; any stored process can be selected as current; any current recipe can be deleted (in which case all generated process steps and all child plots will be deleted too). When you clone a process definition, the step recipes and related plots will not be cloned and must be re-generated by clicking the "Simulate Process" button.
Working with plot frames and table of simulation results
The plot object with a name "$default" is automatically created from the provided templates for any new or just cloned process after its first (successful) simulation. The plot object contains the data sampled from the process steps that allow rendering of any possible combination of the abscissa, the ordinate and the frame type.
There are three main types of frame charts implemented so far:
| Chart type | Explanation |
|---|---|
| StackedAreas | stacked areas separated by lines (curves) |
| CompositeLines | multiple lines (curves) composed on the same frame |
| StackedBars | stacked vertical bars arranged for all simulation steps |
Switching from one chart type to another using the "Chart" selector will automatically redraw the frames. Not all chart types are available for certain types of ordinates.
The abscissa type can be one of four selections in "Abscissa" selector:
| Abscissa type | Explanation |
|---|---|
| Stepwise | process step index (integer from 0 to usually 100) |
| Lead-log | lead control variable shown in log10 scale |
| Lead-linear | lead control variable as defined in process spans |
| Time-log | time in constant increments in log10(hours) scale |
| Time-linear | time in real scale (hours in Hydration-PK process) |
Time is always the lead control variable, if specified in process definition. Switching from one abscissa type to another will automatically redraw the frames. Consistency of Abscissa is required with "Process Lead" type. For this reason, not all abscissa types may be available for a given process.
The ordimate type (one of the "Ordinate" selector options) defines what results (properties of phases, elements, species, residual constituents or materials, etc.) will be actually plotted in the frame. Currently, the following choices are available:
| Ordinate type | Explanation |
|---|---|
| Volumes | volumes of equilibrated phases and residual constituents or of materials without constituents (usually in cm^3) |
| Volumes-solids | volumes of residual constituents (materials) and of equilibrated phases except aqueous and gaseous |
| Masses | masses of equilibrated phases and residual constituents or of materials without constituents (usually in g) |
| Masses-solids | masses of residual constituents (materials) and of equilibrated phases except aqueous and gaseous |
| Aqueous-totals | total dissolved aqueous concentrations of chemical elements in mol/(kg aqueous solution) |
| Aqueous-pH-pe-Eh-IS | pH, pe, Eh and IS (effective molal ionic strength) of aqueous solution |
| ReactExtents | values of reaction extent (degree of reaction) for residual recipe constituents or materials without constituents |
| HeatRates | curves of isothermal heat generation (mJ/g/step), isothermal heat rate (mW/g or mJ/s/g), adiabatic temperature rate (degC/h) and adiabatic temperature rise (degC/step) for cement hydration (for Hydration-PK and Hydration-4PL processes only) |
| HeatCumulative | curves of cumulative isothermal heat produced (J/g) and projected adiabatic temperature due to cumulative adiabatic heat (degC) (for Hydration-PK and Hydration-4PL processes only) |
The "Volumes-solids" and "Masses-solids" ordinates are usually selected to plot the results of a simulation of leaching, where a large amount of water is added [logarithmically] stepwize. More templates for ordinates will likely be added in future. Switching from one ordinate type to another will automatically redraw the frames. Not all ordinate types may be available for a given process.
The "Data Table" widget (located below the plot frame), when expanded, shows numerical values of abscissa and ordinates for each process step per row. The range of steps included in this table can be set using the lower, narrow frame on the plot, by mouse clicking and dragging each side of the "gate". To reset back to default (all steps included in the data table), just single-click on the frame outside of the "gate". The whole data table will be exported (upon clicking the "Export2csv" button) into a .csv format file located in the "Downloads" folder on your device local file system. This file can then be imported into any other spreadsheet or plotting application.
An active Plot document can be cloned into the one with a different name by clicking on the "Clone" button (looks like two squares with a green eye) in the "Simulated ... Plot" row. Enter a new plot document name into the appearing field and click "Clone" button, to see the cloned plot document key selected in the Plot row. The cloned plot document will belong to the same process document as the original plot. The clone should be edited by clicking upon the "pencil" button next to the currently selected plot name field to invoke the jsoneditor widget, where you can change some relevant settings in the plot document. Details on how the plot definition JSON document is arranged and how to modify it can be found in the Expert level and Redefining plots tutorial pages.
Deletion of a plot definition document will also erase its data table that has been collected from the process step results. The plot document with name "$default" can only be deleted when its parent process is deleted (in this case, all other child plots of that process will be deleted too).
Links between recipe, processes and plots
In CemGEMS web app, recipe, process and plot documents are linked through their metadata to maintain overall consistency of the user profile database and to prevent accumulation of "orphan" documents such as process step recipes or plots of a deleted process, or processes built upon a deleted parent recipe. Such metadata links are automatically checked by any attempt to delete a process or recipe document. This boils down to simple rules:
-
deletion of a process document will invoke deletion of its child plot documents;
-
deletion of a recipe document will invoke deletion of all its child processes and all their child plots.
In the case of deletion operation, the web app will issue a warning that requires the user to confirm that this is really what is needed, because multiple deletions may result in a large loss of work and results.
Interrupting the work session
To interrupt the work session without logging out (for instance, going for a lunch break), just close the web browser CemGEMS tab or window. To resume your work session (on the same device and browser), simply navigate back to https://cemgems.app.
If you plan to continue working with your tasks from another device or using a different web browser then log out before closing the browser tab or window.
Continuing your work on another device
Upon logging in on another browser, click on the "pull" arrow-down button to the left of your user name. This will download all your existing tasks and processes, and you will be able to select any of them and work further on. Note that plot data tables and process step recipes are not downloaded and the required processes must be re-simulated (the default plot will be automatically resampled, cloned plots will be resampled when selected). After logging out and closing the session, you can resume your CemGEMS work on the original device/browser after logging in and downloading your user profile, as described above.
Working offline
Offline, temporarily without internet access, you can still edit "inputRecipes" or explore "outputResults" for any existing recipe (you have to be logged in before losing access to internet). You can also replot frames and explore the data tables in plots resampled previously in your current session. However, the "Equilibrate Recipe" button that starts the GEMS equilibrium calculation, and the "Simulate Process" button, will not work. Also, it will not be possible to log in (or log out) and to download all your tasks from the remote. When the internet access is back, simply retry these operations, whichever needed.